Reservation of a worker node
This guide will walk you through the steps of looking up worker node resources and reserving a worker node.
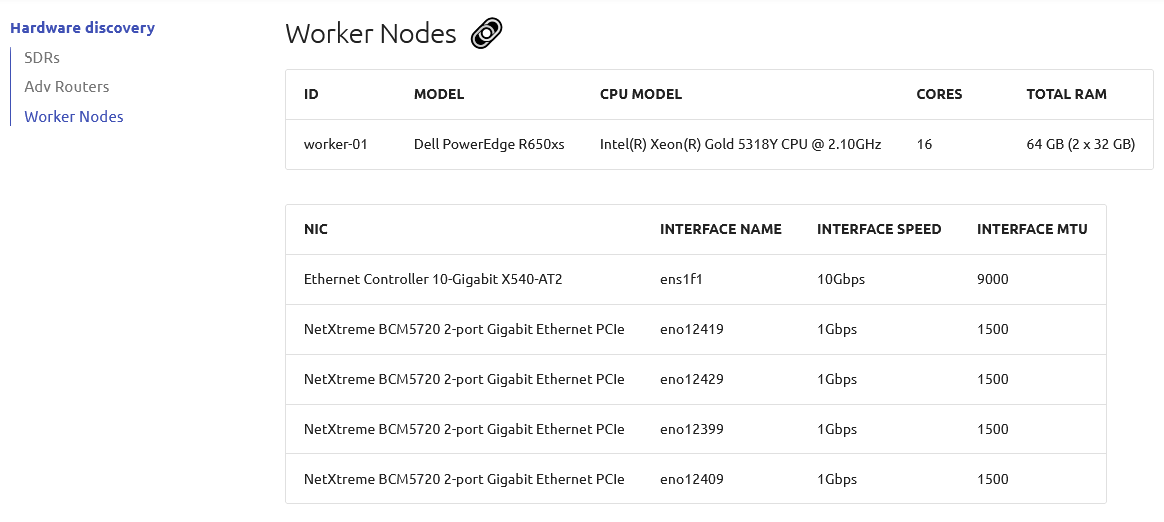
Step 1: Check Hardware discovery
From the ExPECA home page, click Hardware discovery
Look up a worker node that satisfies your requirements
Step 2: Reserving a worker node
We need to reserve a worker node for our use. ExPECA provides access to allocate and run Docker containerized applications on nodes. When you create a reservation for one or more nodes, only you and other users on your project will be able to use those nodes for the time specified. We will create a single day reservation for a worker node.
In the sidebar, click Reservations -> Leases
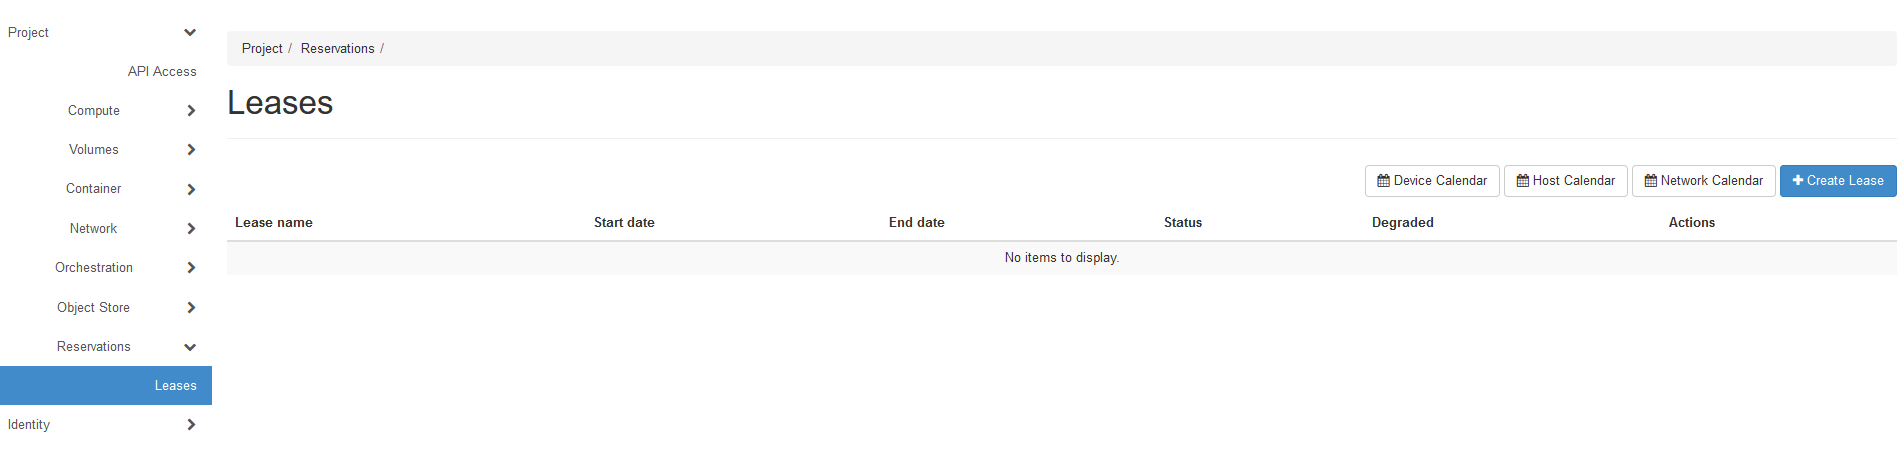
Click Device Calendar. This shows the current worker node reservations in the system. Make sure the worker node you want is not reserved for the time you need it.

Go back to the main lease page
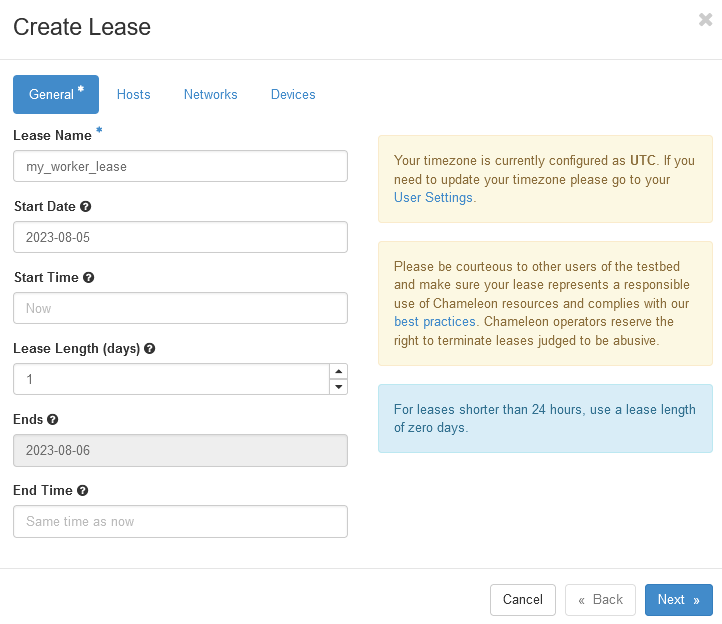
Click on the + Create Lease button in the toolbar
Type my_worker_lease for the lease name (or any name you want to call it)
Make sure you always select a Start Date
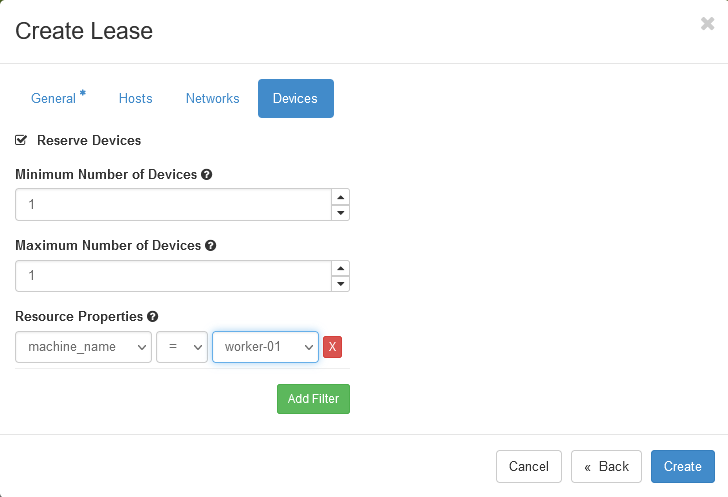
Check the Devices -> Reserve Devices box
Find the Devices -> Resource Properties section. In the dropdown below machine_name, select the worker node you want
Click the Create button
The reservation will start shortly, at which point you can continue.
Note
When you set taday as start date and now as start time, the reservation will start as soon as possible and will last one day.
Important
Do not attempt to stack reservations to circumvent the 7-day lease limitation. Your leases may be deleted. Please refer to the best practices if you require a longer reservation.